Annotating sequencing data
Creating the annotation structure
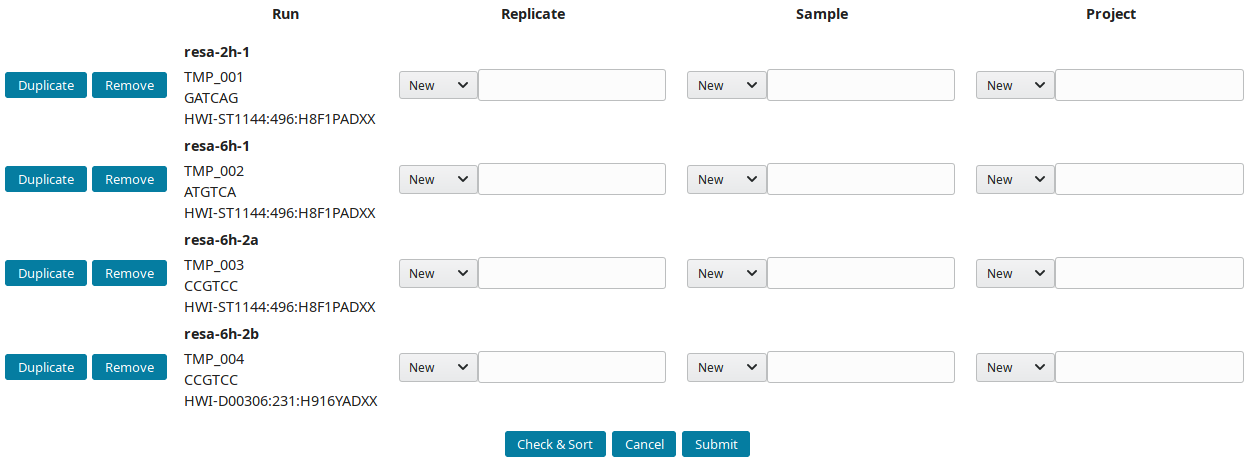
After downloading and importing the sequencing runs, they can be grouped into replicate(s), sample(s) and project(s). The New runs view was implemented to create this tree-like structure:
-
By default, all new runs are displayed in the New runs view. To select a subset of runs, search for a pattern in the top toolbar. For example, to select runs with
TMP_User1prefix use:
These prefixes were assigned using the
--ref_prefixofimport_seq. -
References (IDs) are prefixed by default with AG (AGP, AGS, AGN and AGR for project, sample, replicate and run respectively). Input preferred prefix in the input field:

The structure of the example runs is (B1 and B2 are the first and second biological replicates):
Project  Sample  Replicate  Run (temporary ID)
RESA ___ 2h ___  2h B1 ____ resa-2h-1  (TMP_001)
     \__ 6h ___  6h B1 ____ resa-6h-1  (TMP_002)
            \__  6h B2 ____ resa-6h-2a (TMP_003)
                       \___ resa-6h-2b (TMP_004)
The project RESA was composed of 2 samples (experiments performed at 2 time-points, 2 and 6 hours). The first sample 2h was done in one replicate (B1) while 6h sample was replicated twice (B1 and B2). Replicates were sequenced one, except 6h B2, which was sequenced twice. Using this information, the labels can be input. These labels are entered as Short labels in the database. To validate your input, click on Check & Sort. This will sort the samples and highlight the structure of your annotation:
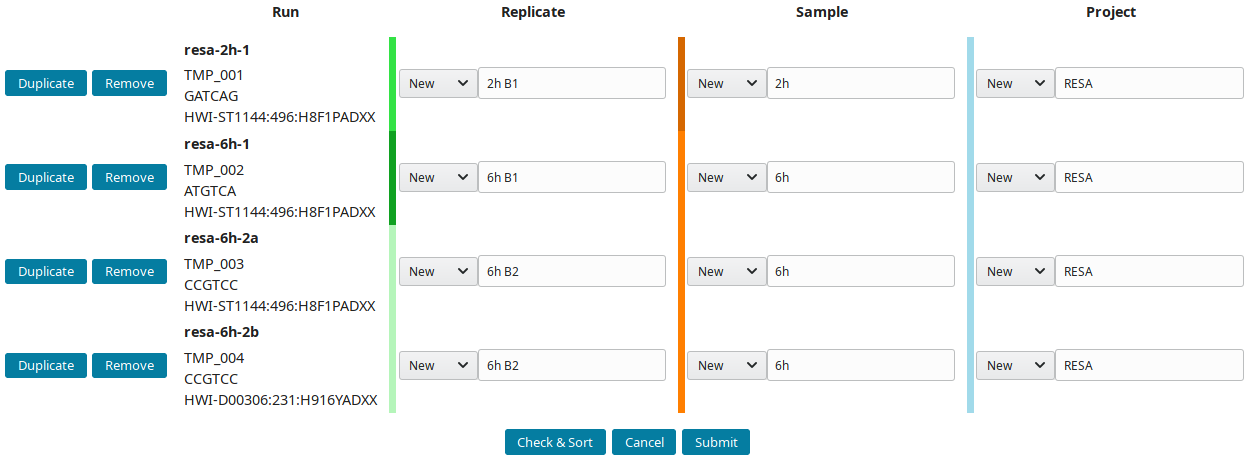
Then submit to let LabxDB seq create the new replicates, samples and project. Use the Tree view to display the new project:
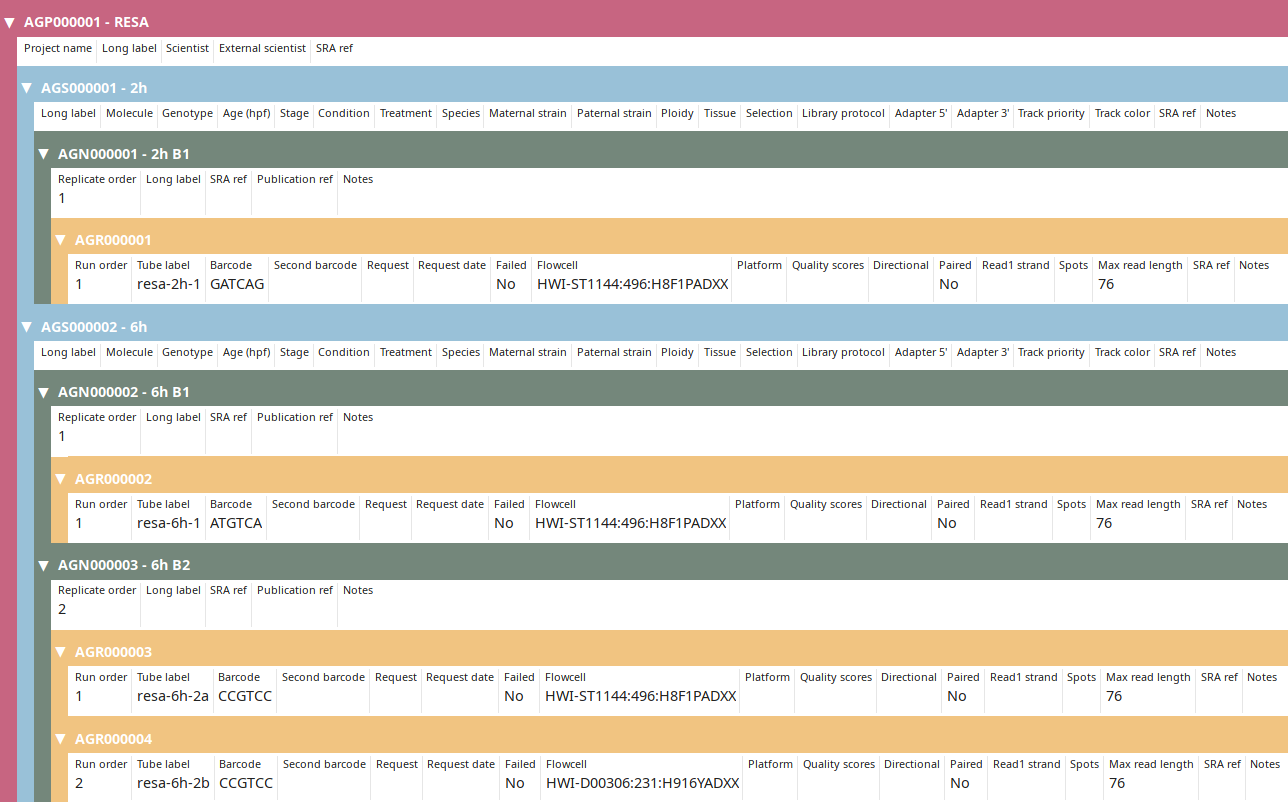
Project annotation
Go to the Project view to find the newly created project and click on Edit.

Input the project information and submit you input:

Sample annotation
To edit at the same time all sample(s), replicate(s) and run(s), click on Full edit on the Project view. In this view, each sample and descendant replicate(s) and run(s) are presented together in a block:
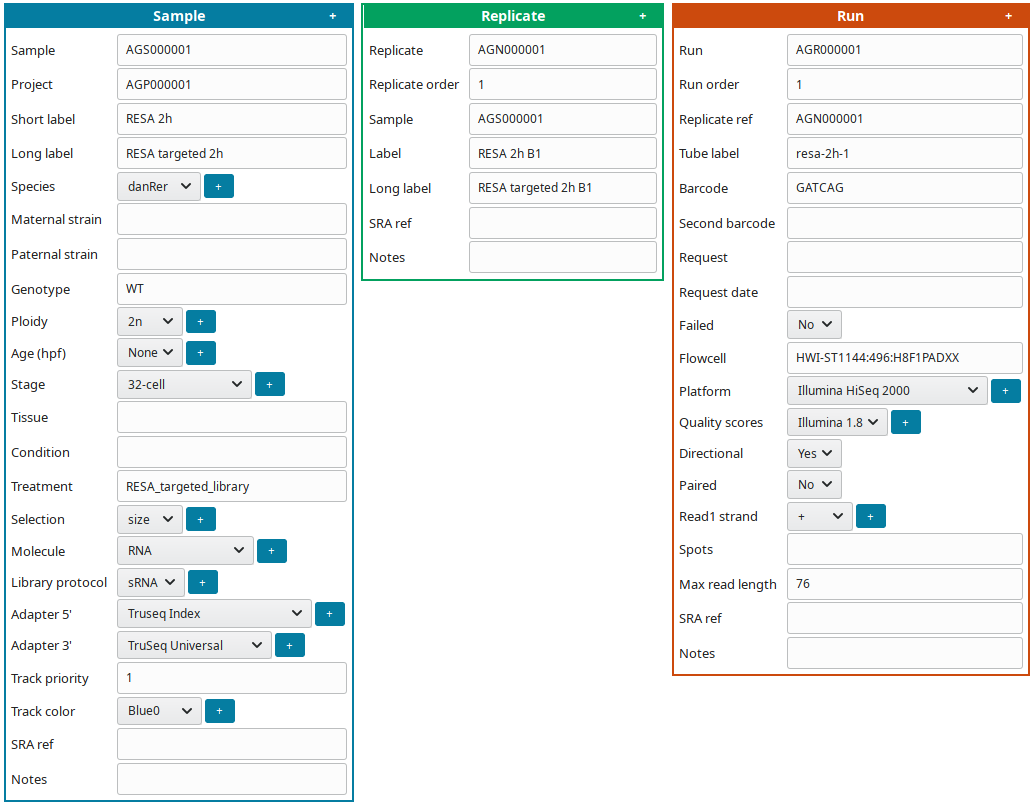
To facilitate editing annotations:
-
Use helping tools:
- Click on the
+symbol (1) to displayCopybutton. - Click on a
Copybutton (2) to replicate the same information on all cells of the same type.
For example, if all samples are from the same species, input the species, click
+(1), them copy the species on all samples (2):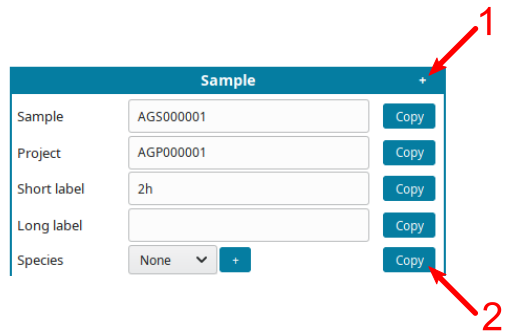
- Click on the
-
Save your annotations in the database by pressing
Submitbutton regularly to avoid loosing any input. -
For dropdown fields: if your entry is missing, click on
+button to add a new category.
Once done click on the Submit & exit button. Back on the Project view, display the finished annotation using the Tree view button:
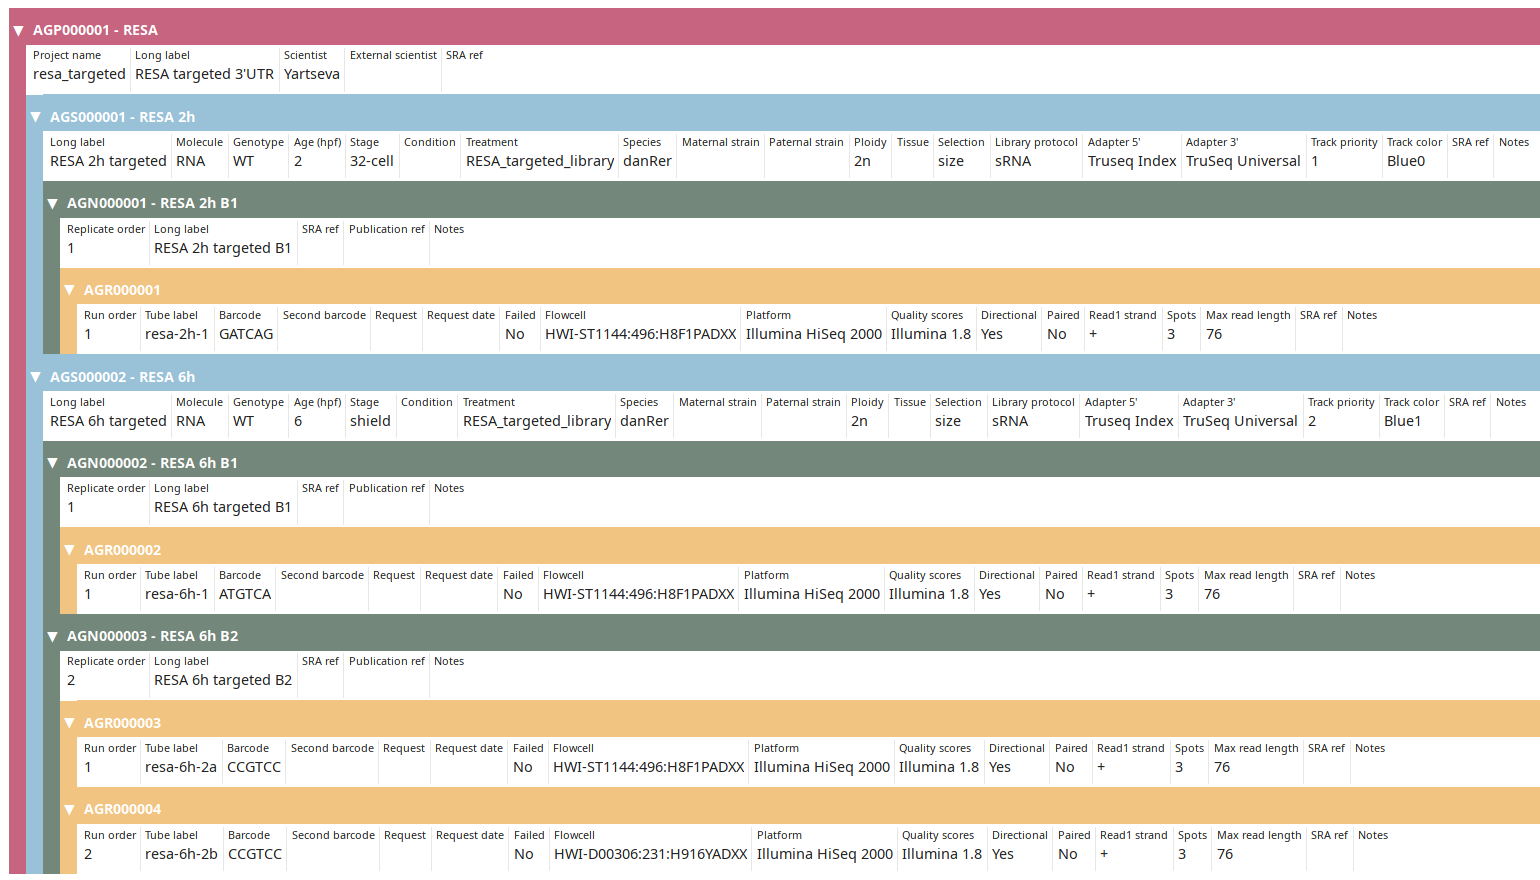
You can then proceed to Post-processing data.